How to deploy xrv9k in vCenter if you have only qcow2 image?
At some times, we only have a qcow2 image, but ESXI(vCenter) only supports vmdk, how to do deploy? In the video guide, I will show how to convert img to vmdk from qcow2, then deploy by import exist hardware(vmdk).
Btw, xrv9k supports only 3 virtual interfaces: e1000, virtio, and VMXnet3. Please notices not support e1000e!
Check image real format
The suffix is sometimes incorrect, and the real format of the file cannot be displayed, we need to check the real format by follow cmd:
[root@gcspr-vxr images]# qemu-img info xrv9k-fullk9-x-7.3.1.08I-usid.qcow2
image: xrv9k-fullk9-x-7.3.1.08I-usid.qcow2
file format: qcow2  <<<
virtual size: 45G (48318382080 bytes)
disk size: 1.3G
cluster_size: 65536
Format specific information:
    compat: 1.1
    lazy refcounts: false
Convert to vmdk from qcow2
“qemu-img” support multi-format convert, in the demo, I only show to vmdk from qcow2. For more information, please check official guide: Converting between image formats
[root@gcspr-vxr images]# qemu-img convert -f qcow2 -O vmdk xrv9k-fullk9-x-7.3.1.08I-usid.qcow2 xrv9k-fullk9-x-7.3.1.08I-usid.vmdk
Create a new VM in vCenter
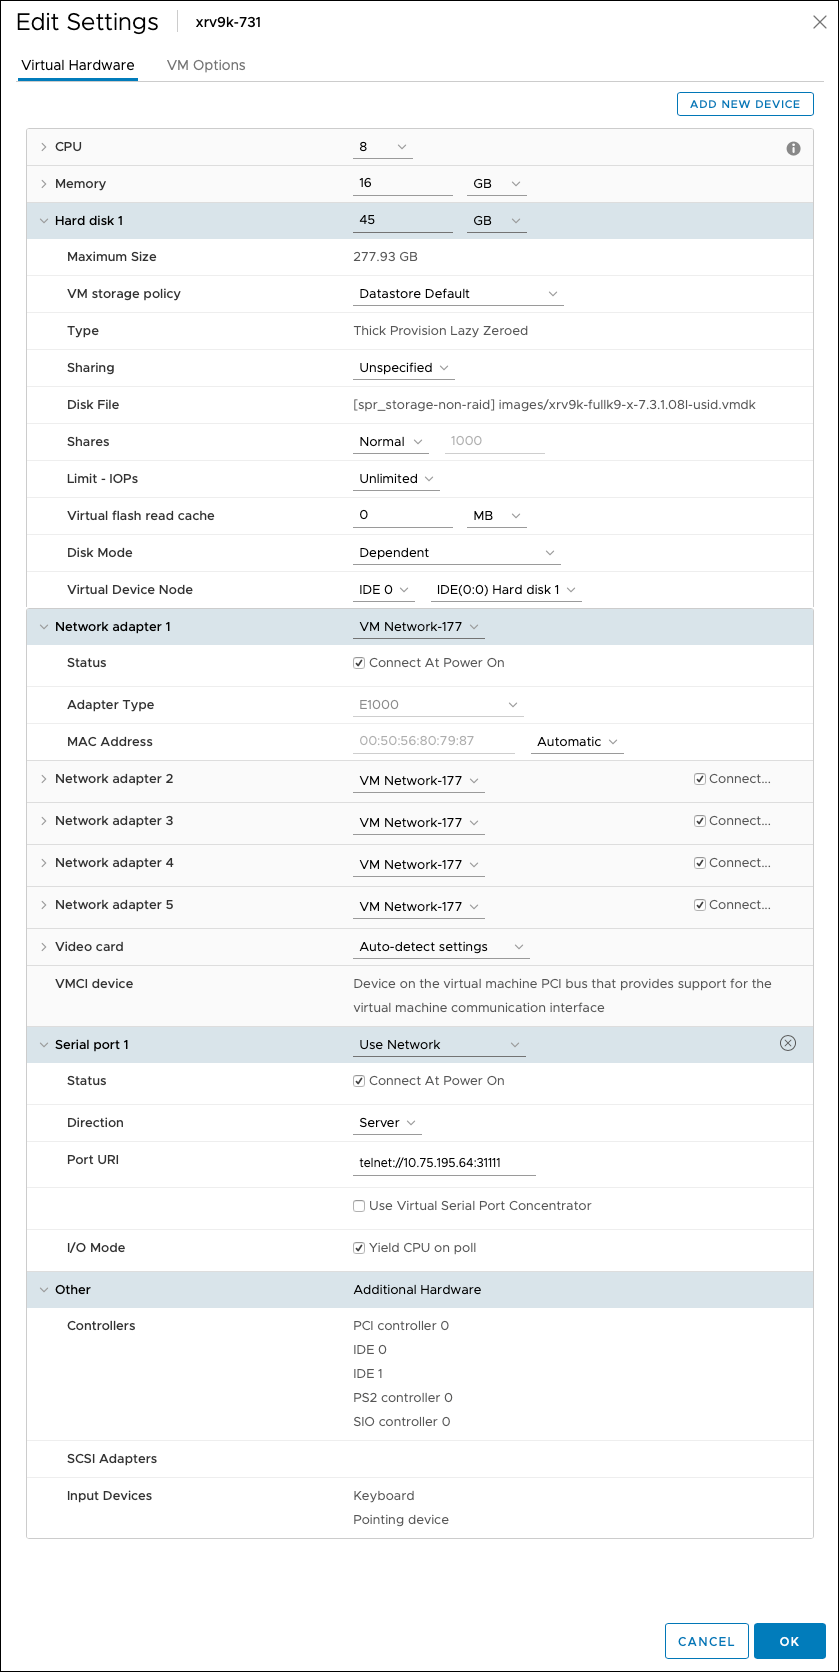
Remove not useful devices, add 5* network adapter, change type to e1000. Ignore detailed steps, can check the video.
Added vmdk by “Existing Hard Disk”
Change “Virtual Device Node” to “IDE 0”; then remove the “New SCSI controller”. Follow the final profile:

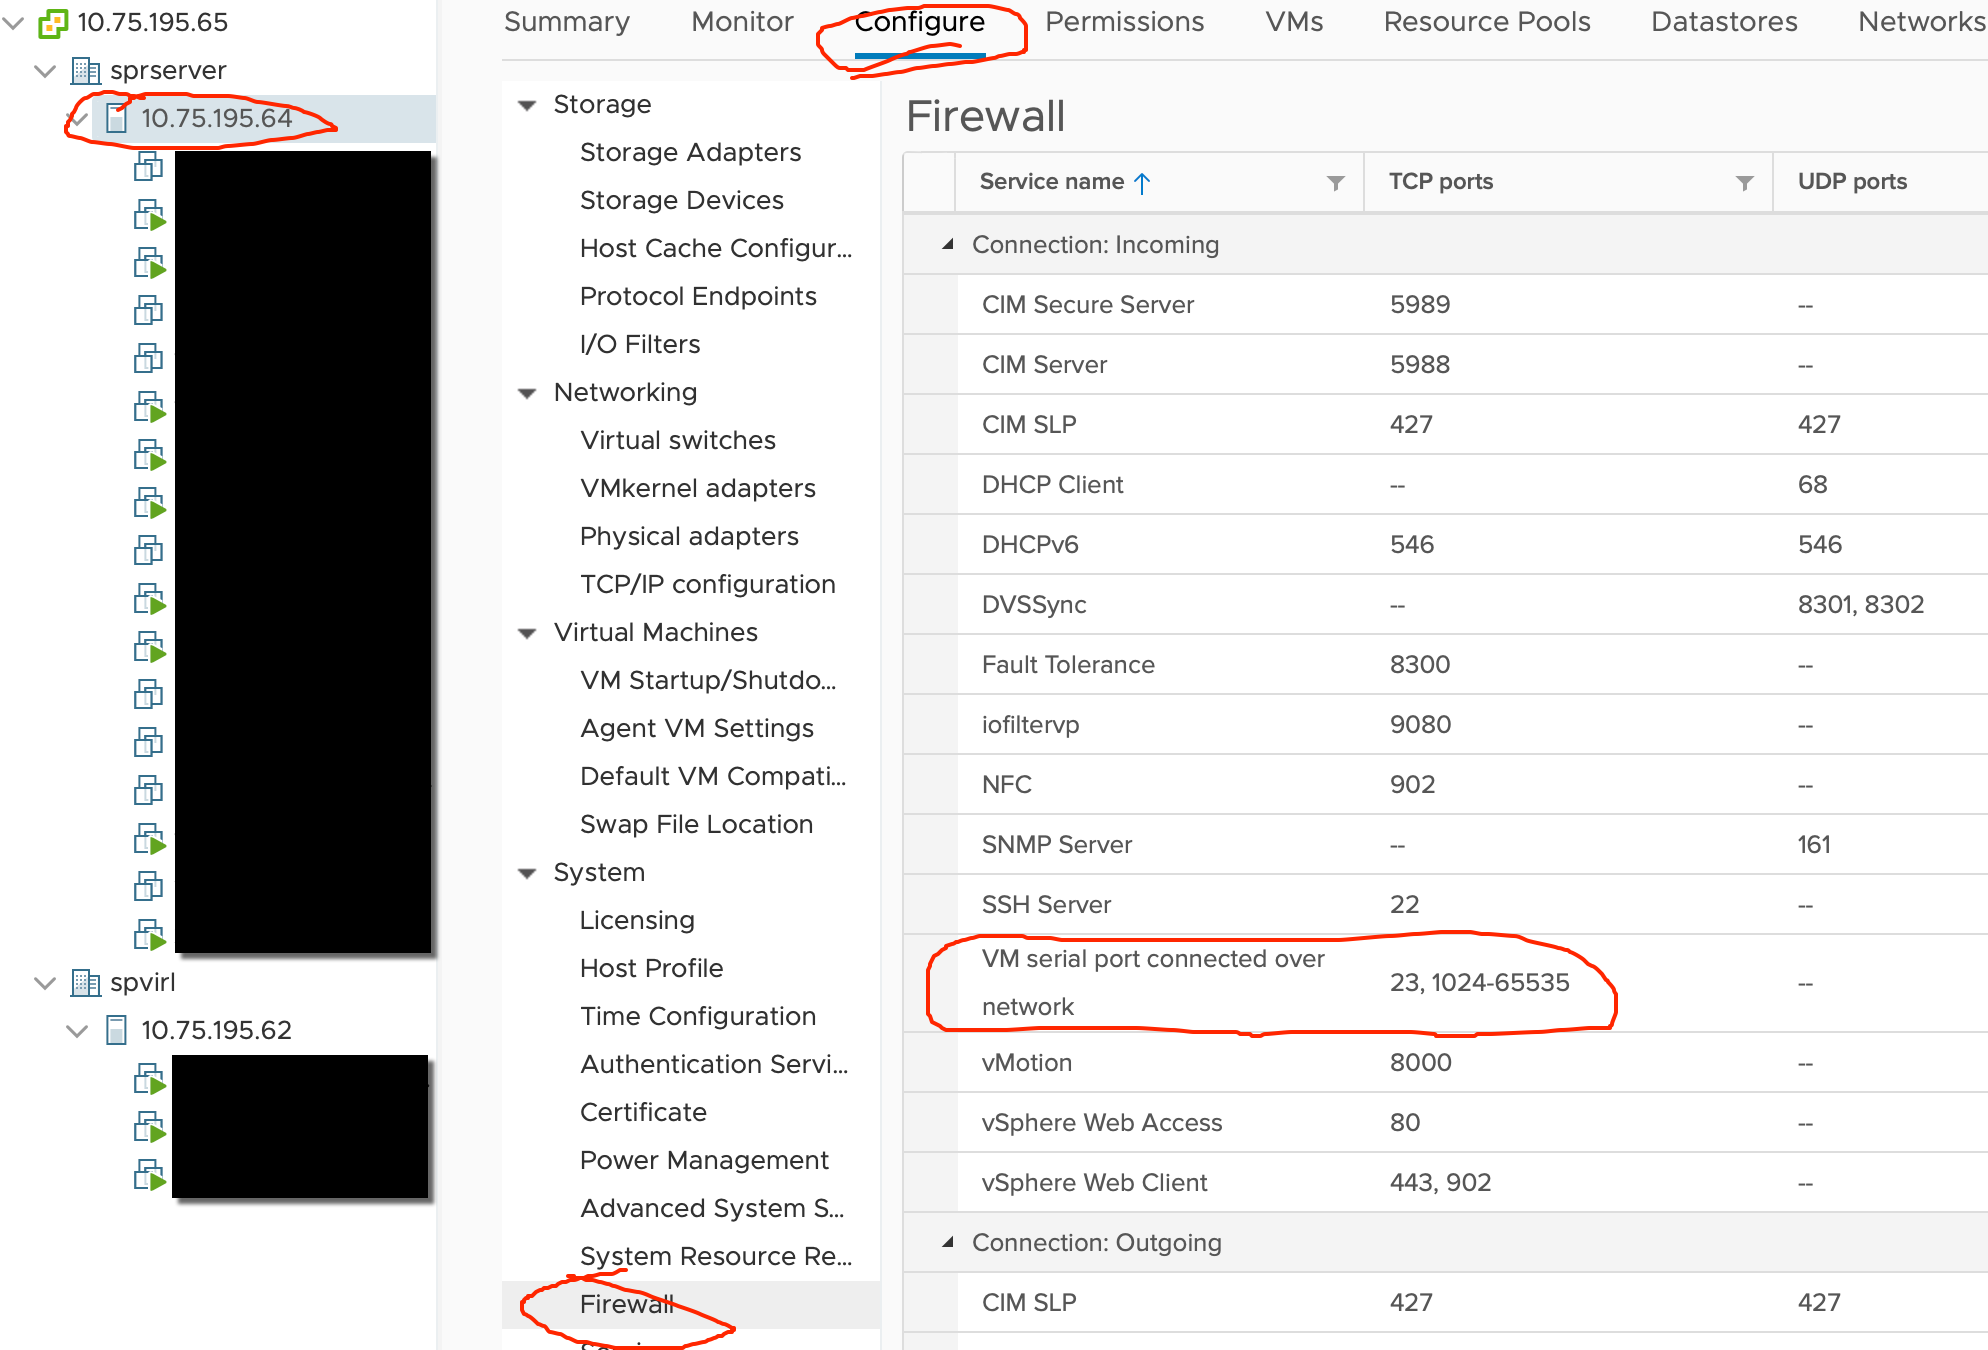
Enable serial port on vCenter/firewall

If you no vcenter, can do follow in EXSI host:
- “Networking” in Navagator
- “Firewall rules”
版权声明:
本文链接:How to deploy xrv9k in vCenter if you have only qcow2 image?
版权声明:本文为原创文章,仅代表个人观点,版权归 Frank Zhao 所有,转载时请注明本文出处及文章链接